How to Convert your Wordpress Site into a Static Site and Host for Free

In this tutorial, I will cover how to generate a static site from your Wordpress blog using the Simply Static plugin and how to host it for free using Cloudflare Pages.
It will involve first onboarding your domain to Cloudflare’s free plan, then uploading your static site to Cloudflare Pages, and finally configuring Cloudflare Pages to use your own domain.
Benefits of a Static Site over a Hosted Wordpress Site
- Less security risks of managing a live hosted Wordpress website where you need to keep on top of patching Wordpress, PHP, and a database
- Less hardware resources are required to host a static website compared to Wordpress as it is just HTML/CSS/JS files instead of Wordpress, with PHP and a database
- Can host for free with Cloudflare Pages
Requirements
Before you start, you will require the following:
- A Wordpress website with access to the admin panel to install, activate and use a plugin
- A domain name and the access to change the name servers on your domain
- A Cloudflare account which can be created for free at cloudflare.com (no credit card required)
Generating a Static Site from your Wordpress Site
Install the Simply Static Plugin in Wordpress
Log into your Wordpress site’s admin panel and go into Plugins.
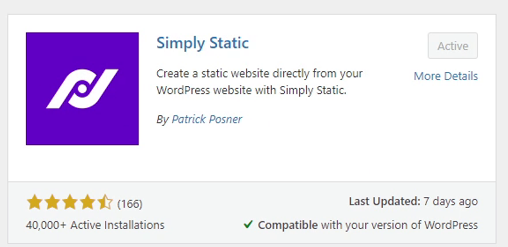
Search for “simply static” and install the Simply Static plugin by Patrick Posner.
After you have installed the Plugin, immediately activate it by selecting the “activate” button.
Generating the Static Site
Refresh the Wordpress admin panel, and select the Simply Static plugin from the side bar.
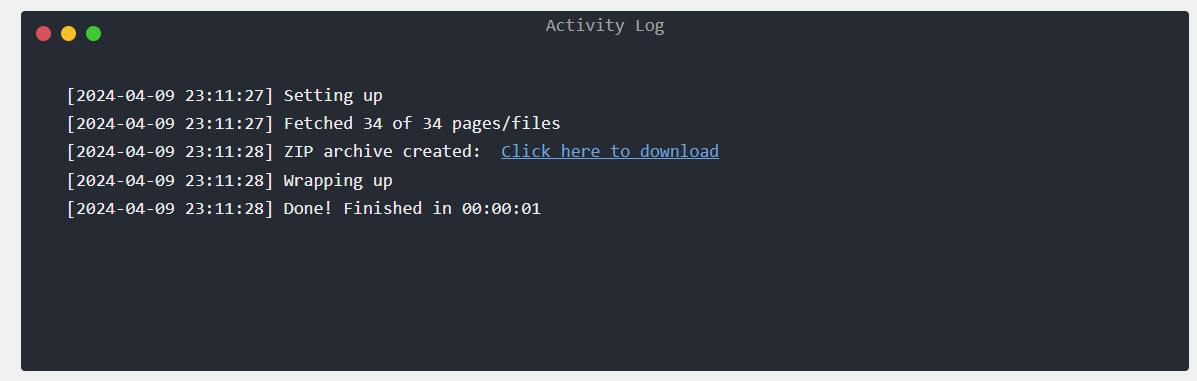
Select the “Generate Static Files” button and the plugin will start to generate your static site.
Once it is successfully completed, it will display a link with the text “Click here to download”, select the link to download a zip of the static website.
Setting up your Domain on Cloudflare
In this tutorial, we will be using Cloudflare Pages to host our static website for free.
Before you can use Cloudflare Pages, you will first need to create a Cloudflare account, then onboard your domain onto their free plan and configure your domain via your domain host to use the Cloudflare name servers.
As mentioned in the Requirements section above, you will need a Cloudflare account which can be created for free at cloudflare.com.
Once you have created your Cloudflare account, login into the Cloudflare dashboard and navigate to the Websites page linked in the sidebar.
From there you can select “Add a site”, enter your domain and select the “Continue” button.
Select the Free plan and click “Continue”.
Select “Continue” again and copy the Cloudflare name servers and access the admin section of your domain host to overwrite your current name servers with the Cloudflare ones. Once this is complete click “Continue”.
Enable “Automatic HTTPS Rewrites”, “Always use HTTPS” and “Brotli” for compression and select “Finish”.
It may take some time for your domain to reflect the changed name servers.
Uploading your Static Site to Cloudflare Pages
Next, we will be enabling Cloudflare Pages on your Cloudflare account, so that you can upload your static site.
In the Cloudflare dashboard, navigate to the “Workers & Pages” section in the sidebar.
In the “Overview” section, select the “Create application” button, go into the “Pages” section and under the “Create using direct upload” heading select the “Upload assets” button.
Please note: Cloudflare Pages has a limitation when uploading a ZIP file via the web browser interface. If your ZIP file is larger than 25 MB or it has more than 1,000 files inside, you will need to use the Cloudflare Wrangler command line interface instead to upload your site.
More details on how to do this are available at following link.
Enter a project name and select the “Create Project” button, select your ZIP file of your static website to upload, then select the “Deploy site” button.
You will be given a “pages.dev” domain to test your static website has been uploaded correctly, from their you can then configure your own domain to also point to this website.
Setting up your Custom Domain on Cloudflare Pages
Navigate to your new project inside the “Workers & Pages” section of the Cloudflare dashboard, and select the “Custom Domains” option to point your own domain to this website.
Select the “Set up a custom domain” button, enter your domain name and select “Continue”.
Cloudflare will configure a new DNS record for you to point your domain to the “pages.dev” domain. Select the “Activate domain” button to proceed.
Wait a short period to wait for the DNS record changes to propagate, then access your domain in the browser and you should be taken to your static website that you have just previously uploaded to Cloudflare Pages.